A tool set or gift kit may contain metal utensils, ceramic parts, bottles, cables and small accessories in one box. These components differ in weight, shape and surface sensitivity, so a generic rectangular foam pad rarely controls them well. A custom EPE foam insert should organize every part, limit movement, protect vulnerable areas and remain practical for workers to pack in repeatable quantities.
For B2B purchasing teams, packaging engineers and brand suppliers, the insert is both a protective component and part of the unboxing presentation. The design therefore needs to balance product retention, carton size, appearance, packing speed and production consistency. This guide explains the information a factory needs before drawing, sampling and producing an EPE insert for tool sets and multi-item gift kits.
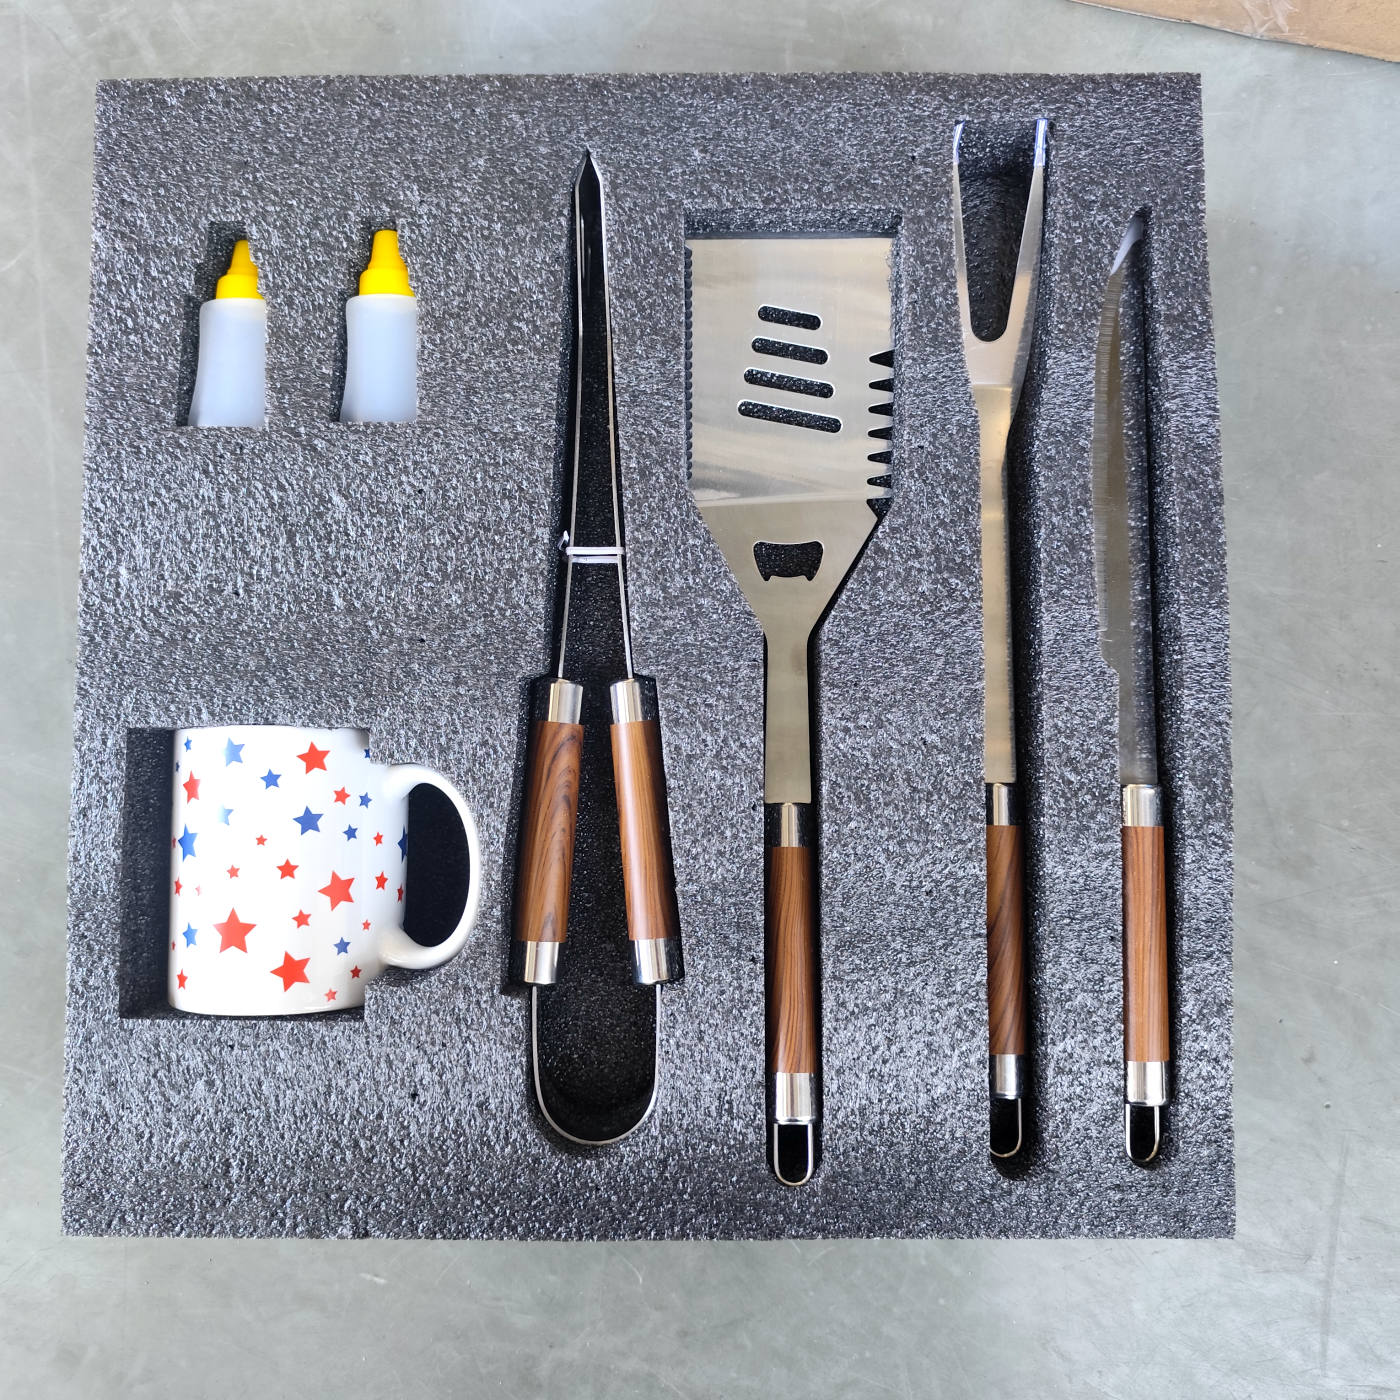
Define the Packaging Job Before Drawing Cavities
Start with the actual distribution and sales conditions rather than the visual layout alone. A retail gift box, an export master carton and a reusable sales sample case place different demands on the same product set.
Confirm these points before discussing the insert:
- all products and accessories included in one saleable set;
- the net weight of each component and the complete packed set;
- surfaces that must not rub, such as polished metal, coatings, printed areas or ceramic finishes;
- parts that can carry load and parts that require intentional clearance;
- the inner dimensions and opening direction of the gift box or carton;
- the intended shipping method and whether the gift box also travels inside a master carton;
- the required presentation order when the customer opens the package;
- whether workers pack the set manually or use a defined packing station.
A clear packaging brief prevents a common problem: approving an attractive insert that does not control movement after the box is closed or that takes too long to pack on the production line.
Create a Complete Product Map
The insert drawing should begin with a complete bill of materials for one kit. Number every product, removable part and accessory, then match each number to a cavity or another retention method. Small items such as cables, replacement parts, caps and instruction cards are easily missed when a layout is prepared from one overview photograph.
For each item, provide:
- maximum length, width and height;
- dimensional tolerance where production parts vary;
- weight and approximate center of gravity;
- the preferred display face and packing orientation;
- fragile projections, sharp edges and no-contact surfaces;
- whether the item must be easy to remove by hand;
- whether any protective bag, sleeve or film stays on the product inside the cavity.
Measurements should include the product in its actual packed condition. A protective bag, cable tie or protruding fastener can change the fit even when the nominal product dimensions are correct.
Choose EPE Color and Structure for the Application
White and black EPE foam can both be used for shaped inserts. Color is mainly a presentation and identification choice; protection still depends on the complete material and structural specification. Buyers should not assume that color alone indicates density, stiffness or cushioning performance.
Black EPE is often selected when a darker presentation helps tools or gift components stand out. White EPE makes dust, marks and cut quality easy to inspect and may suit light-colored packaging. The final choice should consider the brand presentation, product surface, packing environment and approved physical sample.
Structure may use EPE foam sheets as a single cut layer, several laminated layers, a base plus locator layer, or an insert with a separate top pad. Layered construction can create different cavity depths and support levels for products of unequal height. The supplier should show how the layers align and where joints will be visible.
Design Cavities Around Retention and Removal
A cavity has two jobs: retain the component during handling and allow a worker or customer to remove it without damage. A tight outline is not automatically a better design.
Support strong areas and relieve vulnerable features
Let the insert carry load through stable product surfaces. Buttons, polished faces, thin tips, ceramic edges and decorative coatings should not become concentrated pressure points. Relief areas can keep the foam away from vulnerable features while stronger areas control the product.
Control long and heavy tools
Long tools can rotate or lift if only the handle is held. The cavity may need two or more retention zones, suitable end clearance and enough surrounding foam to resist tearing. Heavy pieces should be placed where the insert and outer box can support their load without bending the complete tray.
Add finger access intentionally
Finger notches, pull spaces or exposed grip areas should be part of the drawing, not cut later during packing. They must be large enough for practical removal but should not remove so much foam that the cavity loses support.
Review small accessory retention
Small bottles, cables and spare parts can leave their cavities when the box is turned. Depending on the product, a light interference fit, a deeper cavity, a retaining bridge, a bagged compartment or a top pad may be more reliable than an open shallow pocket.
Every cavity should be evaluated with the actual product and its dimensional tolerance. The sample approval should record which parts use clearance and which use light interference.
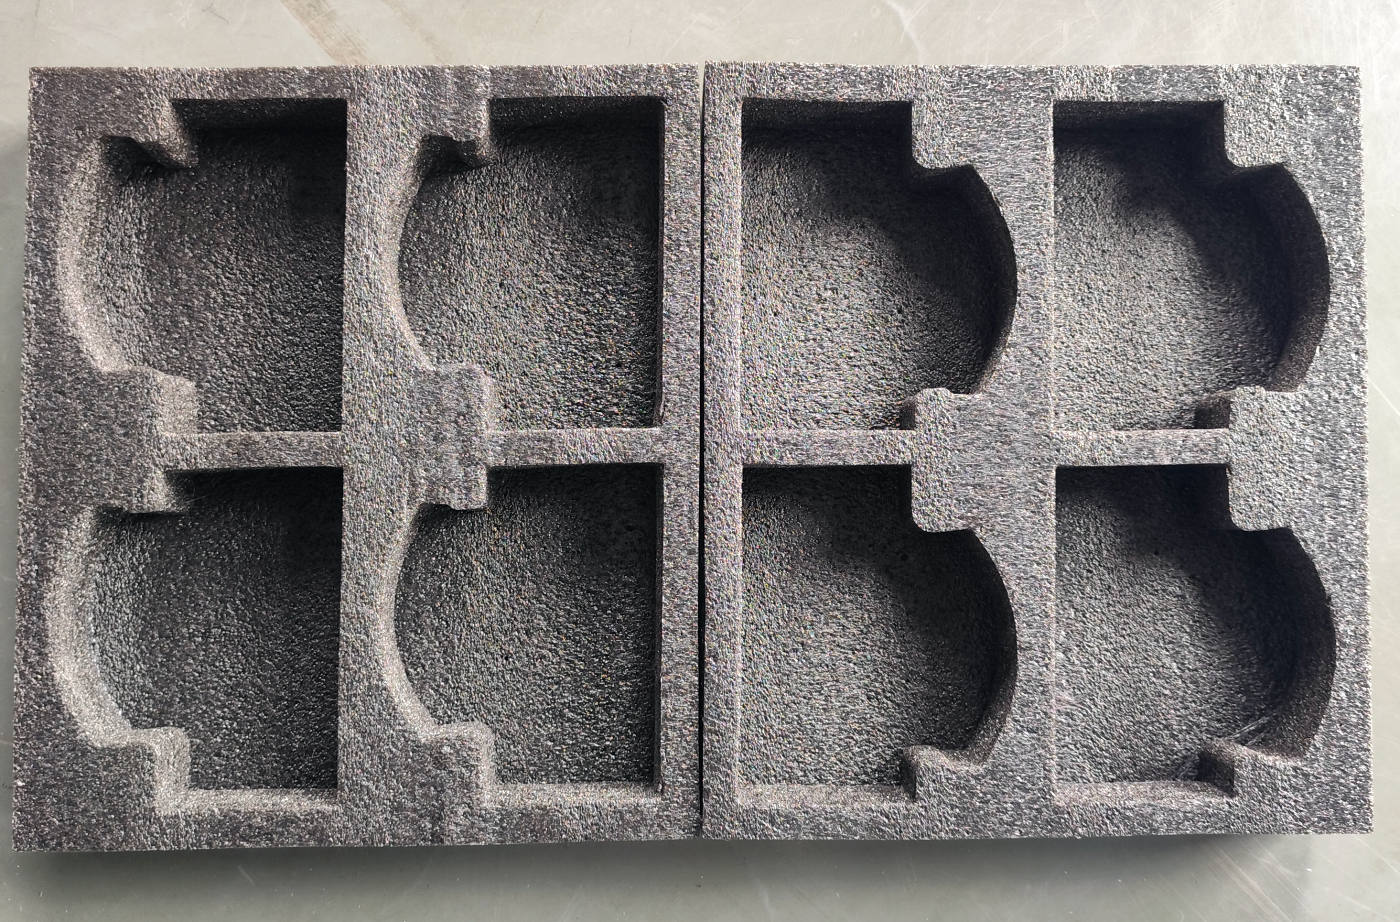
Balance Presentation With Transport Protection
Gift packaging often prioritizes alignment, spacing and a clean visual hierarchy. Transport packaging prioritizes movement control, impact separation and carton strength. A successful B2B design must address both instead of treating them as separate projects.
Useful presentation decisions include:
- aligning handles and labels in a consistent direction;
- keeping regular spacing between related components;
- placing the main product where it is immediately visible;
- hiding instructions or spare parts below a planned layer when appropriate;
- using cavity depths that keep product faces at an intentional level.
After the visual layout is agreed, rotate and close the complete package during the sample review. Components should not collide, rise above the intended level or transfer load to a fragile neighboring item. If the retail box is not designed as a shipping carton, it should also be reviewed inside the master carton system.

Coordinate the Insert With the Box and Carton
The insert thickness and clearance, box usable dimensions and product heights must be checked as one assembled pack. Published box dimensions may not represent the usable internal space after liners, folded edges, magnets, hinges or lid structures are included.
Confirm:
- the actual usable length, width and depth of the box;
- the insert outside tolerance and intended installation direction;
- the tallest product height after it is placed in the cavity;
- the top clearance when the lid is closed;
- whether a foam top pad, fabric liner or paper cover is included;
- how the retail box is protected inside the export or parcel carton;
- whether the finished pack can be stacked without loading fragile products.
An insert that fits on an open worktable may still be over-compressed by the lid or move inside an oversized box. Final approval should always use the intended box, all liners and the complete product set.

Use a Controlled Sampling Process
A physical sample connects the drawing to real product behavior. It is especially important for sets with mixed materials, dimensional variation or presentation requirements.
- Send the supplier the product map, dimensions, photos, weights and box information.
- Review the first layout for part count, orientation, cavity depth and minimum wall areas.
- Confirm the proposed EPE description, color and layered construction.
- Place actual production-representative products in the sample.
- Check retention, surface contact, removal, lid closure and assembled box fit.
- Turn the closed pack through expected handling orientations and inspect any movement.
- Record revisions on the drawing instead of relying only on verbal changes.
- Approve the final sample and matching drawing before batch production.
If the buyer requires a formal drop, vibration or compression test, the method, packed configuration and acceptance criteria should be specified separately. A visual fit review should not be presented as proof of a particular test performance.
Prepare a Quote Package a Factory Can Use
A complete request for quotation helps a custom EPE foam factory compare material use, cutting complexity, lamination and packing requirements without guessing.
Send:
- a dimensioned drawing, 3D file or clear multi-angle photos for every item;
- one complete product set or representative samples when practical;
- the quantity of each item per kit and the target order quantity;
- product weights and important dimensional tolerances;
- the box sample or confirmed usable internal dimensions;
- preferred EPE color and any presentation requirement;
- fragile, sharp, polished or no-contact areas;
- shipping route and whether additional master-carton protection is planned;
- sample quantity, required delivery destination and project timeline.
When information is incomplete, identify assumptions in the quotation and drawing. This makes later changes easier to control and reduces the risk of comparing supplier quotations based on different structures.
Check Batch Production Beyond the First Sample
The approved sample is the reference, but repeatable production also depends on documented checks. Buyers and suppliers should agree which dimensions and appearance points are important for the application.
A practical inspection list may include:
- insert outside length, width and total height;
- critical cavity dimensions and depths;
- minimum walls between cavities and around the tray edge;
- layer alignment and bonding position;
- correct cavity count and product orientation;
- cut-edge condition, loose debris and visible marks;
- fit inside the approved box;
- retention and removal using representative products.
Product revisions should trigger a fit review. A small change to a handle, cap, fastener or surface coating can affect a cavity even when the product name and overall dimensions remain similar.
Reduce Cost Without Weakening the Packaging Logic
Cost reduction should begin with the complete layout rather than simply making every wall thinner. Useful design reviews may include:
- reducing unnecessary empty space while keeping required separation;
- standardizing cavity shapes for repeated accessories;
- placing products to use the sheet area more efficiently;
- simplifying layers that do not add retention or protection;
- separating presentation packaging from shipping protection where appropriate;
- confirming whether the existing box size creates avoidable foam volume.
Any change should be checked in the assembled sample. Lower material use is only helpful when the kit still packs efficiently, presents correctly and remains controlled through its expected handling conditions.
Questions to Ask a Custom EPE Foam Supplier
- What product information is still missing from the proposed layout?
- Which surfaces carry the product load and which have relief?
- How are long or heavy components prevented from rotating?
- Which cavity dimensions require sample confirmation?
- How will the insert fit the actual box after all liners are installed?
- What layers or separate pads are included in the quotation?
- Which drawing revision and sample will control batch production?
- What inspection points should be agreed before shipment?
Shanghai Hongying can review product drawings, photos, samples and box dimensions to discuss cavity layout, EPE structure, sample making and batch supply for tool sets and multi-item gift kits. Final dimensions and material choices should be confirmed against the buyer’s actual products, box and handling requirements.
FAQ
Is EPE foam suitable for metal tool-set packaging?
It can be suitable when the cavity layout, support areas, material specification and outer box are designed for the actual tool weight and shape. Long tools, sharp points and concentrated loads require particular attention during sampling.
Should a gift-set insert use black or white EPE?
Choose color for the intended presentation, identification and packing environment. Do not use color as a substitute for specifying density, thickness, structure and fit. Approve the actual material sample.
How can an insert stop tools from moving when the box is turned?
Use controlled cavity fit, sufficient depth, support at more than one point for long items, and a suitable top-retention method where needed. Confirm the closed package in expected handling orientations.
Can a factory design an EPE insert from photos only?
Photos can support an initial discussion, but reliable cavity design requires dimensions and usually a representative product or an agreed physical sample. Box dimensions and product tolerances are also important.
Does every product need a tight interference fit?
No. Delicate surfaces and dimensionally variable products may need clearance, while some robust parts may use light interference for retention. The relationship should be chosen item by item and approved with the actual set.
What should be approved before mass production?
Approve the complete product count, drawing revision, EPE description, color, layer construction, cavity fit, removal method, outside dimensions, box compatibility, physical sample and agreed inspection points.