Bottles and glass jars combine several packaging risks in one product: a rigid but breakable body, a narrower neck, a cap or closure that may project above the body, and a surface that can scratch when neighboring items move. A circular hole in foam is only the beginning of the design. A custom EPE foam insert must control the container at suitable support areas, separate glass surfaces, fit the intended box and remain practical for workers to load in repeatable quantities.
This guide is written for B2B buyers sourcing packaging for wine sets, beverage bottles, glass jars, decorative containers and related gift packs. It explains what information an EPE foam factory needs, which dimensions affect cavity design, how to approve a physical sample and what to check before placing a batch order.

Start With the Complete Bottle Packaging Brief
The same bottle can need different packaging depending on whether it is sold as a single retail item, arranged in a gift set, shipped in a parcel network or packed in an export master carton. Define the packaging job before fixing the insert layout.
Provide the supplier with:
- the number of bottles, jars, glasses and accessories in each package;
- the filled and unfilled weight of every container;
- the material of the container and closure;
- the preferred display orientation and box opening direction;
- the retail box or carton usable internal dimensions;
- the intended shipping route, handling method and secondary carton;
- surfaces, labels, decorations or closures that must not carry load;
- the target order quantity and packing method.
A clear brief helps the factory design one packaging system instead of treating the foam, product and carton as separate parts.
Measure More Than the Maximum Diameter
A bottle drawing should identify the body diameter, shoulder transition, neck diameter, cap diameter and total height. For a jar, measure the widest body area, lid, base profile and any handle or projection. Decorative glass may have ribs, curves or local high points that change how it contacts the foam.
Record a tolerance range when containers vary between production lots. A cavity designed only around one nominal diameter may become too tight for a larger unit or too loose for a smaller unit. If labels, shrink sleeves, bags or protective films remain on the product during packing, include their thickness in the packed dimensions.
Weight distribution also matters. A tall filled bottle may be top-heavy, while a thick glass base can concentrate load at the bottom. These conditions affect support location, base thickness and whether the package needs a top retaining pad.
Support the Body Without Loading the Neck or Closure
Use stable bearing areas
The main foam support should contact areas capable of carrying the product weight. For many bottles, this means the body and base rather than a pump, cork, cap edge or narrow glass neck. A cavity can use different diameters at different depths so the bottle is located without transferring load through the closure.
Leave relief around fragile projections
Sprayers, droppers, decorative caps and thin handles may need intentional clearance. A visibly close outline is not useful if the foam presses a vulnerable feature every time the product is inserted. Mark all no-contact zones on the drawing and confirm them with the actual container.
Control vertical movement
A body cavity may limit sideways movement but still allow the bottle to lift when the package is turned. The complete pack can use suitable cavity depth, a shoulder feature, a separate top pad or a fitted lid structure. The chosen method should hold the product without continuously crushing the cap or label.
The approved sample should show exactly where the bottle is supported and which features remain free from pressure.

Set Cavity Fit and Depth for Real Packing Conditions
As explained in our EPE thickness and clearance guide, a cavity that is too loose permits rubbing and impact between the container and insert. A cavity that is too tight slows the packing line, can wrinkle labels and may make glass difficult to remove. The correct relationship may be clearance, close fit or light interference depending on the product tolerance, foam behavior, surface sensitivity and removal method.
Depth influences both retention and presentation. A deep cavity can hold a tall container more securely, but the buyer may need a finger notch or exposed grip area. A shallow cavity may display more of the product but often needs another form of top retention. Discuss the intended unboxing experience and transport orientation together.
When the same package holds containers of different heights, a layered insert can create separate support levels. Each depth should be dimensioned rather than described only as a percentage of the product height.
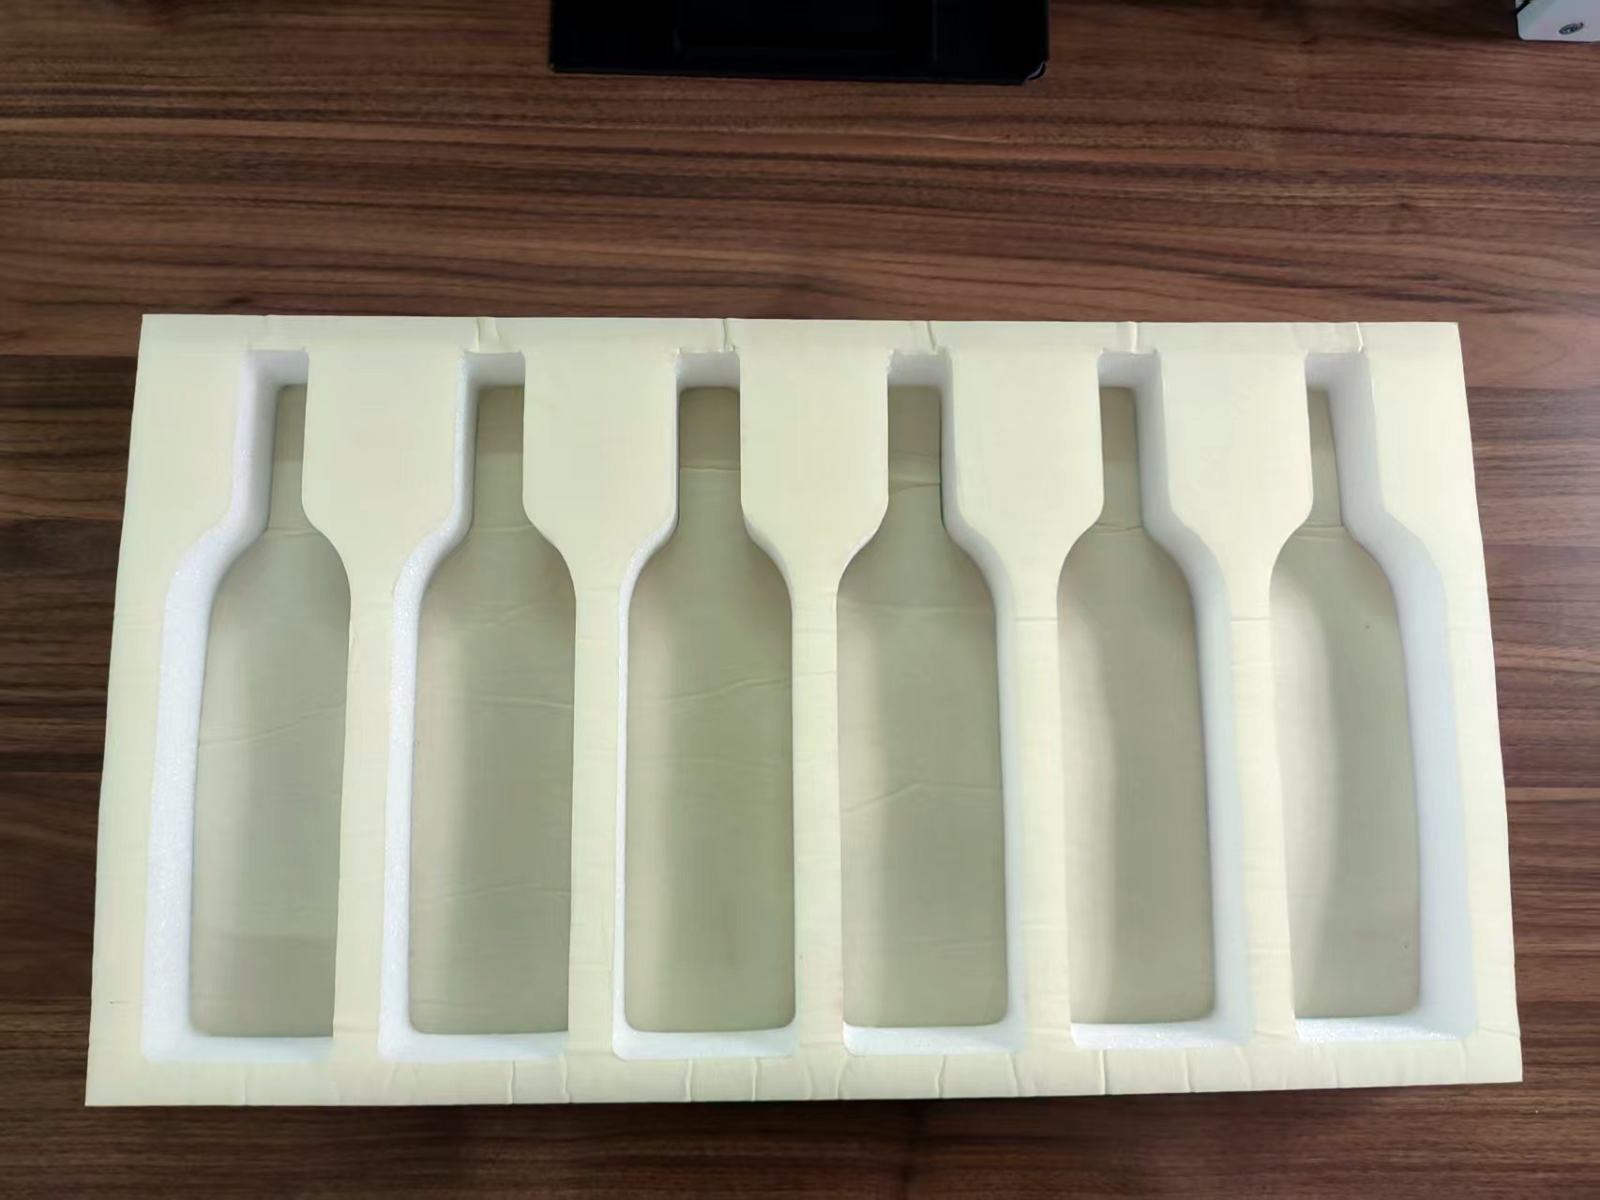
Design Multi-Bottle Layouts Around Separation
Multiple bottles need enough foam between cavities to prevent contact when the insert flexes. Check the narrowest divider, the outside edge around the tray and the space between bottle shoulders, not only the distance between cavity center lines.
For a mixed wine or beverage set, the layout may also include glasses, an opener and small accessories. Each item needs its own retention logic. Long accessories can rotate if they are held at only one point, while stemware needs relief around delicate rims and stems.
Keep a consistent packing orientation where possible. Clear orientation reduces packing mistakes, helps inspection and creates a cleaner presentation when the box is opened. If two products look similar but have different dimensions, identify their positions on the drawing or packing instruction.
Adapt the Structure for Glass Jars and Short Containers
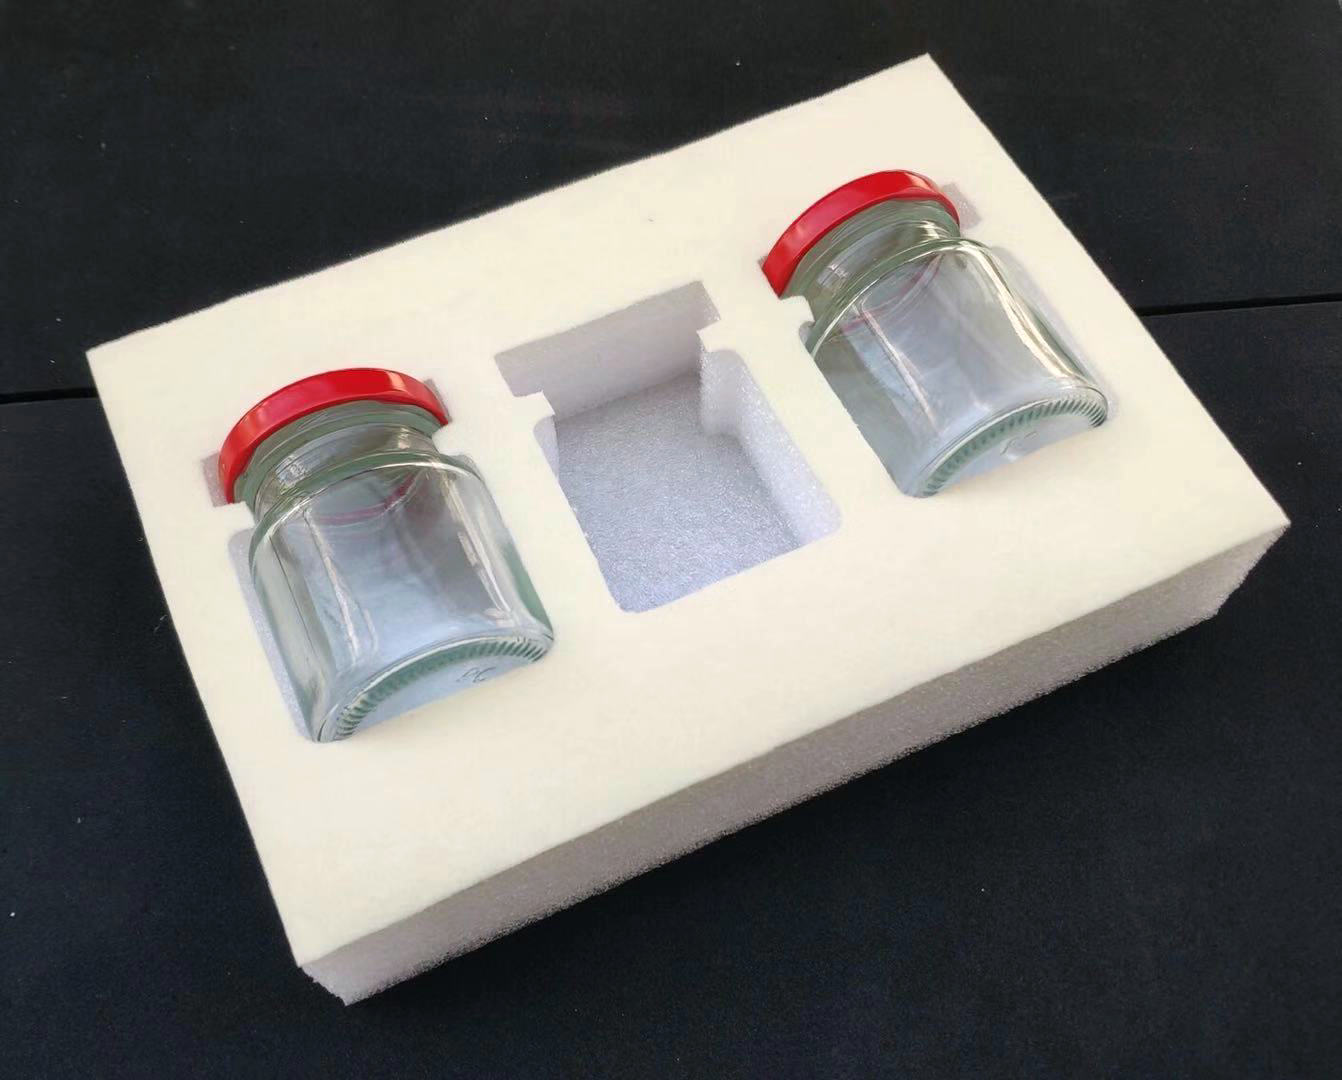
Short jars and decorative containers can be stable in one direction but easy to lift out of a shallow tray. Their lids may be wider than the body, and some bases have a small bearing ring instead of a flat full surface. Measure these details before setting the cavity profile.
A multi-jar insert should provide finger access without creating a weak bridge between cavities. If jars contain liquids or powders, the packaging design should also avoid using the closure as a structural stop. The foam insert protects and positions the packaged container; it does not replace the buyer’s responsibility to specify suitable closure integrity and any required leak-control measures.
For colored, coated or printed glass, check whether the surface can tolerate direct foam contact. A bag, sleeve or liner may remain on the product, and the cavity should be designed around that final packed condition.
Coordinate the Insert, Gift Box and Shipping Carton
Retail presentation boxes may include folded edges, magnets, fabric liners or thick lids that reduce usable space. Measure the finished box rather than relying only on an outside size from a box drawing. Confirm the insert outside length, width and total stacked height with every liner and top pad installed.
Check these assembled conditions:
- the insert fits the box without buckling or large side gaps;
- the tallest closure does not contact the lid unintentionally;
- the product does not rise out of the cavity when the closed box is turned;
- the retail box has appropriate protection inside the parcel or export carton;
- stacking load is carried by the packaging structure rather than a fragile cap or rim;
- workers can install and remove the insert without damaging the box finish.
A presentation box and an export carton perform different jobs. If the gift box is not designed for distribution, add suitable secondary protection instead of expecting the display insert to solve every transport risk.
Use a Physical Sample Before Approving Bulk Production
Drawings are necessary, but bottle and jar packaging should be approved with production-representative containers and the intended box. A useful sample review follows a controlled sequence:
- confirm the product revision, fill condition, closure and label;
- compare cavity dimensions with the drawing;
- load every item using the planned packing order;
- check pressure at the body, shoulder, neck, cap and decorated surfaces;
- inspect removal access and packing time;
- close the complete box with all pads and liners;
- turn the package through expected handling orientations and inspect movement;
- record changes on the drawing and approve the final sample together.
If formal drop, vibration, compression or temperature testing is required, the buyer should define the method, packed configuration and acceptance criteria. A visual sample check alone should not be represented as proof of a specific performance level.
Send a Complete RFQ to the EPE Foam Factory
A factory can prepare a more useful quotation when the request follows a complete EPE insert RFQ checklist and describes the full packaging system. Send:
- dimensioned product drawings and clear photos from several angles;
- one set of representative bottles, jars, glasses and accessories when practical;
- filled product weights and dimensional tolerances;
- the box sample or usable internal dimensions;
- quantity per package and target order quantity;
- preferred foam color and presentation requirements;
- no-contact areas, sensitive labels and fragile projections;
- shipping method, destination and secondary carton plan;
- sample quantity and required project schedule.
Ask the supplier to state what is included in the quotation: base layer, cavity layer, top pad, lamination, packing method and any separate components. This makes supplier comparisons more meaningful.
Define Batch Inspection Points
The final sample is the physical reference, while the drawing controls measurable details. Agree which characteristics should be inspected during production and before shipment.
Typical checkpoints include:
- insert outside dimensions and total height;
- critical cavity diameters, depths and shoulder features;
- minimum divider and outside-edge dimensions;
- layer alignment and bonding position;
- correct product count and orientation;
- cut-edge condition, loose particles and visible marks;
- fit inside the approved box;
- retention and removal using representative containers.
A bottle or closure revision should trigger a fit review even when the product name stays the same. Small diameter or height changes can affect retention and lid clearance.
Reduce Packaging Cost Through Layout, Not Guesswork
Cost reduction should preserve the functions confirmed in the sample. Useful reviews may include reducing unused space, arranging repeated bottle sizes efficiently, simplifying unnecessary layers, using one shared cavity profile where tolerances allow, or adjusting the box size to reduce excess foam volume.
Do not reduce every divider or base dimension without checking the assembled pack. A smaller insert is valuable only when containers remain separated, workers can pack efficiently and the complete box still meets the buyer’s handling requirements.
Work With Shanghai Hongying on a Bottle Insert Project
Shanghai Hongying can review bottle and jar drawings, photos, samples, box dimensions and packing requirements to discuss EPE color, cavity structure, sample making and batch supply. Final dimensions and material choices should be based on the buyer’s actual containers, closures, box and distribution conditions.
For an efficient first review, send one complete product set, the usable box dimensions, filled weights, target quantity and photos of all fragile or no-contact areas.
FAQ
Can EPE foam be used for wine bottle gift sets?
It can be considered when the insert supports suitable bottle areas, separates glass products, controls vertical movement and fits the complete gift box and shipping carton. The final structure should be confirmed with physical samples.
Should the cavity hold the bottle neck tightly?
Not automatically. The neck or closure may be vulnerable and should not become the main load-bearing point unless the product design and sample review support that decision. The bottle body and base often provide more stable support areas.
How much clearance should a bottle cavity have?
There is no universal clearance. It depends on product tolerance, surface sensitivity, foam behavior, required retention and packing method. Confirm the relationship with representative products and an approved sample.
Does a deep cavity remove the need for a top pad?
Not always. A deep cavity can improve lateral retention, but the product may still lift when the box is turned. Review the closed package and use suitable top retention where required.
Can one insert hold bottles, glasses and accessories?
Yes, but each item needs appropriate support, clearance and removal access. Glass rims, stems, caps and long accessories should not be treated as identical cavity shapes.
What should a buyer approve before mass production?
Approve the product revision, container count, drawing, EPE description, color, cavity fit, layer construction, top protection, box compatibility, physical sample and agreed inspection points.